
|

|

|

|

|
|
3DCG Demo Reel |
|
|
Shot Breakdown |
|
|
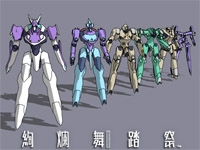
Kenran Butosai: The Mars Daybreak
The models in this sequence are part of a series of 18 Mech and Submarine models that I produced for the Sony PlayStation 2 game, "Kenran Butosai: The Mars Daybreak."
I have modeled and rigged all of the models based on detailed character sheets provided by the Art Director of the project. This game was base on a Japanese Anime and "Toon Shaded" in the game. I have presented them here with a Toon Shader that approximates their appearance on the game system. Each of the 18 models was designed with a polygon budget of 5,000 triangles in mind. The Mechs are rigged and fully articulated according to the requirements outlined by the Project Engineer. |
|
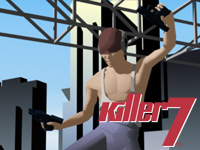
Killer 7
These are a few of the characters that I built for the game, "Killer 7" on Nintendo GameCube game, and later the PlayStation 2.
I modeled, UV mapped, textured, skin weighted and rigged these characters for use in a real-time game environment. The character designs are based on character sheets provided by the Character Designer on the project. On this project, the overall look that was requested, was a camera dependant vertical gradation shader. I designed the Maya shading networks used in the game, and worked closely with the engineering department to implement them as they came out of Maya. This made for the most efficient production pipeline, where what was rendered in Maya, was what was seen on the game system. I built the city background used in this scene as a proof of concept, to test the character in an environment. I designed the motion capture rig used on all characters in the game, and personally directed many of the main character and in-game sequence motion capture sessions at Capcom Headquarters in Osaka, Japan. I modeled all of the custom designed weapons in this game. They were also rigged to be fully articulated and animatable with minimal time and effort and training. |
|
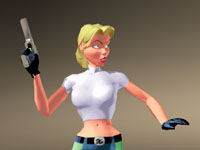
Danger Girl
This is part of a project based on the "Danger Girl" comic book character.
Ive based the shading network appearance on a modern comic books coloring style. For this character I modeled the arms in an Attention Pose (arms at the sides) with shoulders more relaxed, instead of in the more common da Vinci Pose. This a was an attempt to minimize some of the shoulder deformation problems inherent to the da Vinci Pose. This character was also a bit of a modeling exploration. Specifically, I was looking for the simplest possible geometry that would still represent the muscles and joints, and convey the shape properly when flexed. This model is ~5,000 triangle polygons. The body animation is done using an animation rig of my own design. The facial animation has been achieved through the use of Blend Shapes. There are currently a simple base set of 13 facial Blend Shape targets, based on exaggerated facial expressions. |
|
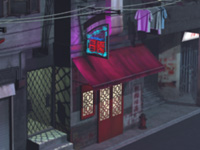
Kawloon Walled City
This sequence is from a project that is based loosely on Kowloon Walled City in Hong Kong.
I was looking to create a believable environment as a backdrop for characters I was working on to interact.
Many of the textures were adapted from photographs of the original location, as well as selected other locations I photogrpahed in downtown Hong Kong, and China Town, in Yokohama, Japan. I used Mayas 3DPaint tools, Photoshop and Painter to create the textures and manipulate the photographic reference. The cloth objects were modeled and relaxed into their current shape using Maya Cloth. A few of the models in this scene, such as the metal gates, garbage cans, and fire hydrant are stock, provided by Viewpoint Data Labs. |
|
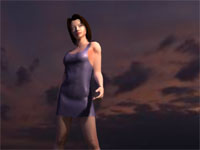
Ryo
This was an exercise in creating a realistic character to be used as a digital actor/spokesmodel.
She has been modeled in the likeness of the Japanese actress/model "Ryo."
I worked from photographic reference. The height and proportion are also comparable to the real person. The Lip-Sync animation has been achieved through the use of Blend Shapes. There are currently 25 facial Blend Shape targets, based on some of the major facial muscles. The body is fully articulated using a rig of my own design. I have also automated the rigging operation using MEL. The character can now be re-rigged quickly after any refinement of the model. The dress was modeled and animated using Maya Cloth. This sequence was rendered using the MentalRay Render for Maya. I used Final Gathering/Global Illumination to add a bit of fill lighting and color from the dusk sky. The sky background is a 360º stock sky photograph. |
| No portion of this site may be reproduced in any form, or part, without the prior written consent of the author. thaumogenesis@mac.com |